Skip to content
Home » Documentation » Contact Form 7 – Dynamic Text Extension » Quick Start Guide

Quick Start Guide

If you haven’t already, please install/activate the plugin before proceeding.

New form fields

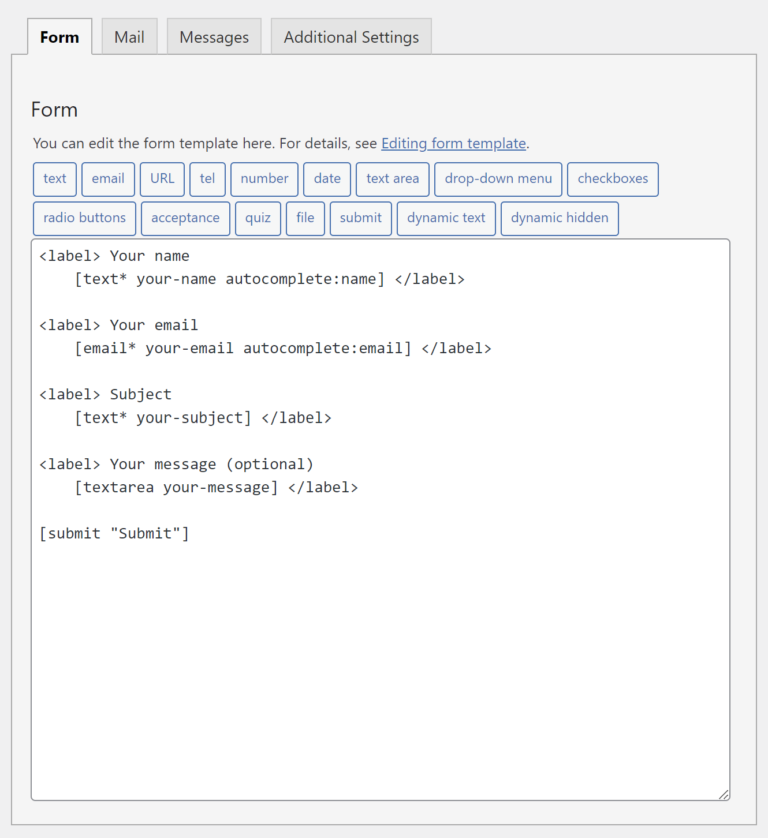
The Contact Form 7 Dynamic Text Extension (DTX) adds two form field tags to Contact Form 7, dynamic text and dynamic hidden. They appear beside the other tags when editing a Contact Form 7 form.

Screenshot of the Contact Form 7 form edit screen with the buttons dynamic text and dynamic hidden highlighted.

Adding a dynamic field

Time needed: 5 minutes

Let’s walk through an example of adding a dynamic text field to a new contact form created by Contact Form 7 that prepopulates the field with the current user’s first name.

  1. Create/Edit your form

    For this example, I’ll create a new form. In the screenshot below, you can see the default form and it’s four (4) form fields: your name, email, subject, and message.

    A screenshot of the Contact Form 7 form edit screen with the default form and it's 4 fields: name, email, subject, and message followed by the submit button.

  2. Add a dynamic field

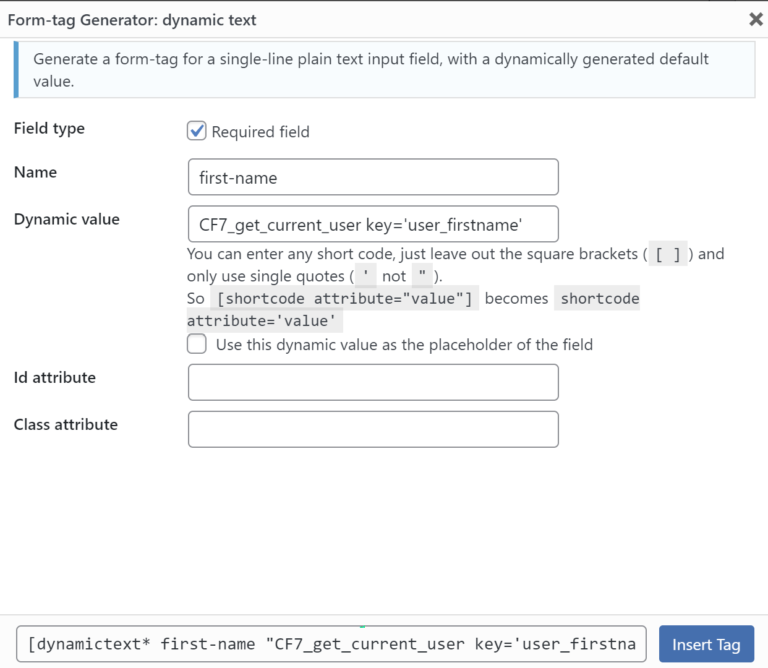
    In my example, I’ll create a form field for the user’s first name that automatically populates the value with the current user’s name from their WordPress profile. I start by clicking on the “dynamic text” button to open the form tag generator popup.

    For this field, I’ll be using an included shortcode, CF7_get_current_user and setting the value of key to user_firstname so my dynamic value becomes CF7_get_current_user key='user_firstname' (be sure to use the correct syntax)

    A screenshot of the form tag generator showing all the settings laid out in this step.

  3. Insert tag and save the form

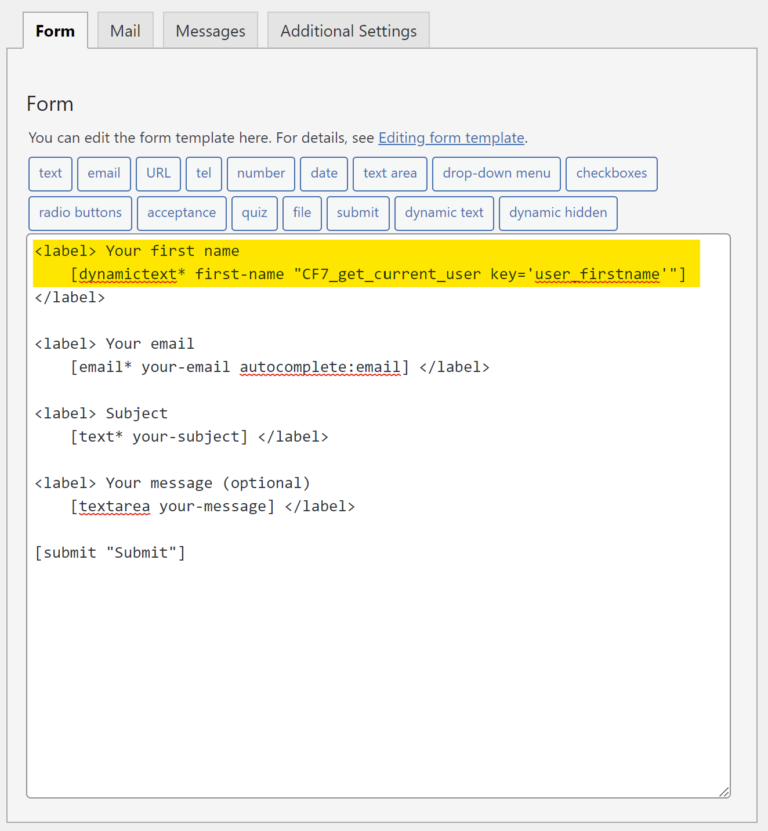
    I click the “Insert Tag” button in the form tag generator popup and I see my tag is added to the form as [dynamictext* first-name "CF7_get_current_user key='user_firstname'"]
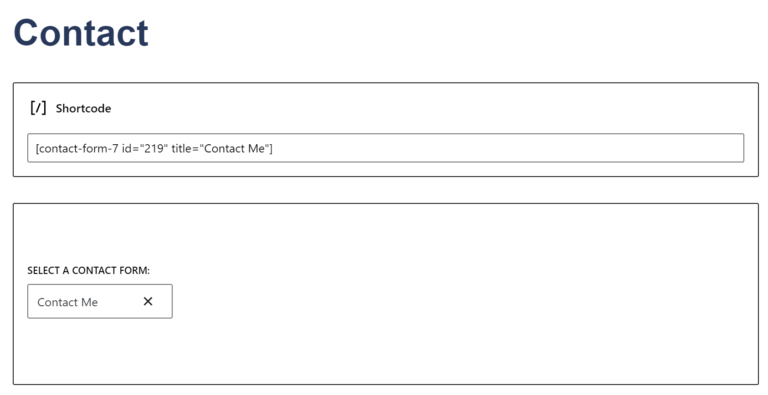
    A screenshot of the Contact Form 7 form edit screen with the name field changed out to a dynamic text field and uses an included DTX shortcode in the value to automatically pull the currently logged-in user's first name

  4. Add form to page

    Depending on the editor you’re using, add the form to your page. The screenshots below show the Gutenberg editor using the shortcode block and the Contact Form 7 block as an example.
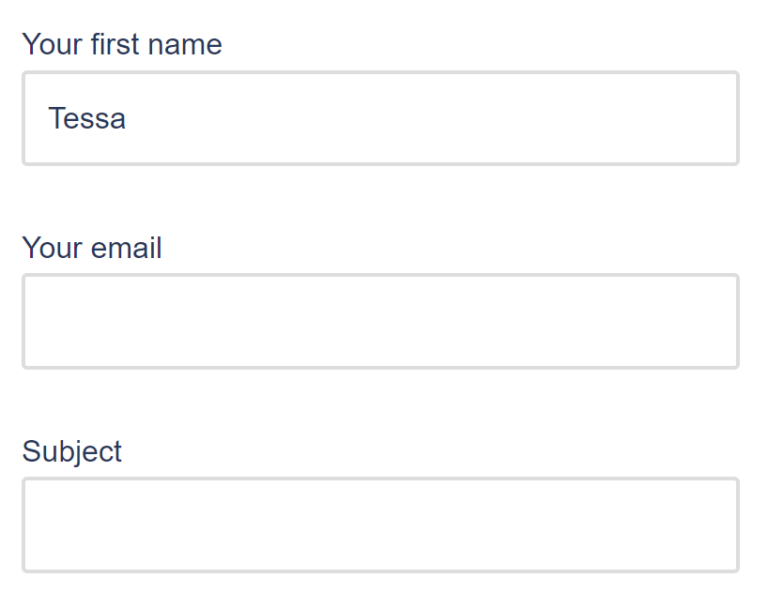
    A screenshot of an edit page using the Gutenberg editor. The first example shows the shortcode block with the CF7 shortcode inside while the second example shows the CF7 block with the new form selected.

  5. Preview page

    After adding the form to a page, save it as a draft and click preview. You should now see your first name as it is entered in your WordPress profile set as the value of the first name form field.

    A screenshot of form showing 3 fields: your first name, your email, and subject line. The first name field is already populated with the text: Tessa

Related Post Module Attributes Before

array(29) {
  ["post_type"]=>
  string(4) "post"
  ["post_id"]=>
  string(1) "0"
  ["exclude"]=>
  string(1) "0"
  ["title"]=>
  string(32) "Related Articles & Tutorials"
  ["description"]=>
  string(0) ""
  ["max"]=>
  string(1) "3"
  ["post_ids"]=>
  string(0) ""
  ["exclude_ids"]=>
  string(0) ""
  ["is_series"]=>
  string(0) ""
  ["featured_term"]=>
  string(3) "307"
  ["exclude_terms"]=>
  string(0) ""
  ["exclusive"]=>
  string(1) "1"
  ["order"]=>
  string(4) "DESC"
  ["show_image"]=>
  string(2) "on"
  ["image_size"]=>
  string(6) "medium"
  ["menu_order_label"]=>
  string(0) ""
  ["show_order_label"]=>
  string(2) "on"
  ["show_date"]=>
  string(2) "on"
  ["show_meta_keys"]=>
  string(2) "on"
  ["show_modified"]=>
  string(0) ""
  ["show_author"]=>
  string(0) ""
  ["show_categories"]=>
  string(0) ""
  ["show_primary_category"]=>
  string(0) ""
  ["show_description"]=>
  string(0) ""
  ["show_reading_time"]=>
  string(2) "on"
  ["show_cta"]=>
  string(2) "on"
  ["cta"]=>
  string(9) "Read more"
  ["autoplay"]=>
  string(0) ""
  ["allow_sticky"]=>
  string(0) ""
}

Related Post Module Attributes

array(29) {
  ["post_type"]=>
  string(4) "post"
  ["post_id"]=>
  string(1) "0"
  ["exclude"]=>
  string(1) "0"
  ["title"]=>
  string(32) "Related Articles & Tutorials"
  ["description"]=>
  string(0) ""
  ["max"]=>
  string(1) "3"
  ["post_ids"]=>
  string(0) ""
  ["exclude_ids"]=>
  string(0) ""
  ["is_series"]=>
  string(0) ""
  ["featured_term"]=>
  string(3) "307"
  ["exclude_terms"]=>
  string(0) ""
  ["exclusive"]=>
  string(1) "1"
  ["order"]=>
  string(4) "DESC"
  ["show_image"]=>
  string(2) "on"
  ["image_size"]=>
  string(6) "medium"
  ["menu_order_label"]=>
  string(0) ""
  ["show_order_label"]=>
  string(2) "on"
  ["show_date"]=>
  string(2) "on"
  ["show_meta_keys"]=>
  string(2) "on"
  ["show_modified"]=>
  string(0) ""
  ["show_author"]=>
  string(0) ""
  ["show_categories"]=>
  string(0) ""
  ["show_primary_category"]=>
  string(0) ""
  ["show_description"]=>
  string(0) ""
  ["show_reading_time"]=>
  string(2) "on"
  ["show_cta"]=>
  string(2) "on"
  ["cta"]=>
  string(9) "Read more"
  ["autoplay"]=>
  string(0) ""
  ["allow_sticky"]=>
  string(0) ""
}