Overview
Access to post metadata and user data via the built-in shortcodes are disallowed by default.
To allow access to specific metadata or user data, WordPress administrators can add those keys to the Allow Lists by navigating to Contact > Dynamic Text Extension in the WordPress backend.
Keys that are not on the allow list will return an empty string. If a disallowed key is encountered when outputting one of the above shortcodes, a PHP Warning will be triggered, indicating the key that is attempting to be accessed and needs to be allow-listed for use.
We’ve provided both a Form Scanner tool and extended Contact Form 7’s Form Validator to make it easy for WordPress users to determine which keys are affected.
Security Considerations
To give users flexibility when setting up their contact forms, DTX provides the following shortcodes for general access of post and user data:
- CF7_get_custom_field to allow access to any meta data for any post or page.
- CF7_get_current_var to access any post variable or metadata for the current post or page.
- CF7_get_current_user to access to any user data for the current user.
This means that any logged-in user with the ability to edit contact forms (e.g., contributor+ access) had the potential to access or reveal sensitive data. If there are untrusted users with access, this can pose a security risk.
Access Control
To address this potential vulnerability, access to all post meta and user keys for built-in shortcodes are disallowed by default. WordPress administrators have the authority to add specific keys that they have deemed safe to expose to the allow lists, so that those keys can then be used with our shortcodes. Only keys that are listed on the allow lists will return values when accessed via the above shortcodes. Keys that are not on the allow list will return an empty string.
To allow access to specific metadata or user data, WordPress administrators can add those keys to the Allow Lists by navigating to Contact > Dynamic Text Extension in the WordPress backend.
Accessing Post Metadata
By default, all post metadata is disallowed. This section allows administrators to open access as desired.
Keep in mind:
- Our shortcodes can reveal any meta data on any post or page, including custom post types.
- Users of different authorization levels and capabilities, including anonymous site visitors that can view a contact form on a publicly published page of your site, should potentially not have access to this data.
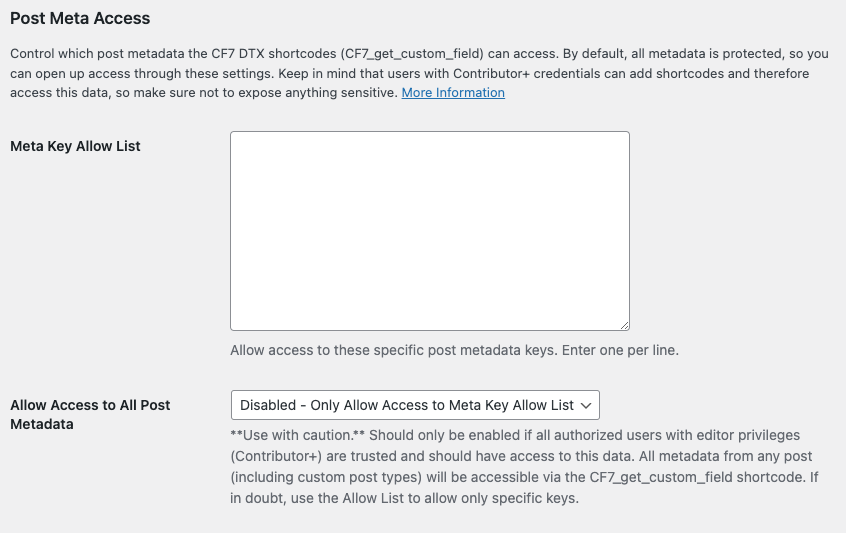
Use the Meta Key Allow List setting to allow access to specific meta keys. One key should be added per line.
If all authorized user accounts with edit capabilities on your site are trusted (that is, Contributor+ credentials), you can globally allow all post meta access with the Allow Access to All Post Metadata option. This is provided for convenience for those who are sure of what they are doing, but it is recommended to use the allow list and leave this setting Disabled.
Accessing User Data
By default, all user data access is disallowed. This section allows administrators to open access as desired.
Keep in mind:
- Our shortcode can allow access for the current (logged in) user, so the vulnerability potential here is for users to find out data about their own account that might be private or if an unauthorized person/bot gained access to a user account that doesn’t belong to them.
- User data includes things like the username, email address, (hashed) password, and other personally identifiable information or potentially sensitive data.
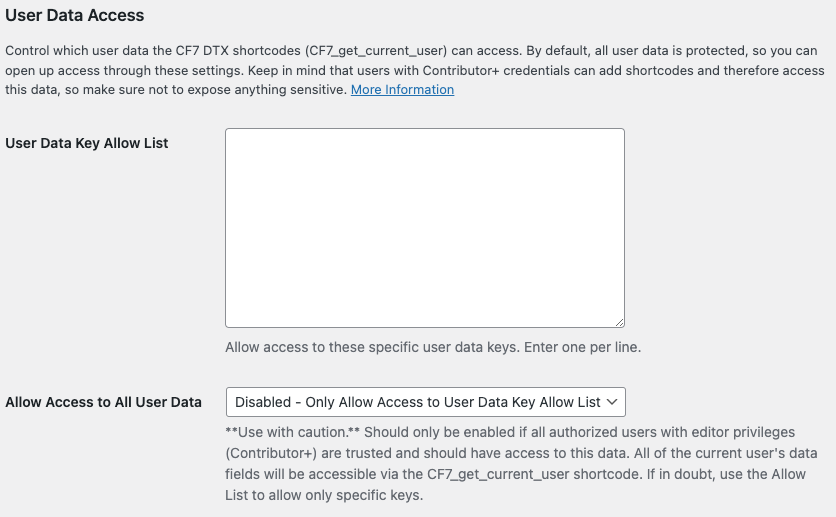
Use the User Data Key Allow List setting to allow access to specific user data keys. One key should be added per line.
If all authorized user accounts with edit capabilities on your site are trusted (that is, Contributor+ credentials), you can globally allow all user data access with the Allow Access to All User Data option. This is provided for convenience for those who are sure of what they are doing, but it is recommended to use the allow list and leave this setting Disabled.
Programmatic Control via Filters
If you are a developer and need programmatic control over the allowed keys, you can use the following filters:
wpcf7dtx_post_meta_key_allow_listwpcf7dtx_user_data_key_allow_list
Both filters work the same way:
- They act on an array of allowed keys (strings)
- They must return an array of strings (or you’ll break things)
- The filter runs last in the process, meaning the
$allowed_keysparameter will contain the keys that have been manually allow-listed in the settings page - The filter is irrelevant if access is globally allowed from the settings page
Here’s an example of using the user data filter to allow access to user’s email addresses.
/**
 * Allow Contact Form 7 DTX to Access User Email Addresses
 *
 * @param array Sequential array of allowlisted user data keys.
 *
 * @return array Possibly modified sequential array of allowlisted user data keys.
 */
function au_dtx_user_allowlist($allowed_keys){
    $allowed_keys[] = 'user_email'; // Add custom meta key
    return $allowed_keys;
}
add_filter('wpcf7dtx_user_data_key_allow_list', 'au_dtx_user_allowlist');